Sunday, September 15, 2019

Classroom Set Up 2019-2020

A new school year is upon us!

One of my favorite things to do each year is set up my classroom. I love seeing the change from boring old grey, sad space to bright, colorful learning environment!

Here are my 'before' pictures:


One of the challenges with this classroom is that is pretty small for 24 students. So I have to get creative with how I organize the desks and other furniture. I do not believe that students learn best in rows, so my class is always set up in table groups. But with this space, I've split some of my table groups into what we call workstations. These are 2-desk table groups scattered around the edges of the room.

I use modified flexible seating in my class. 


This means that I don't assign seats, and students are free to move around to where they learn best. Some kids know that they do better with less distractions at one of the workstations. I also have a bunch of light stools that can be moved from place to place as we need them. I picked these up from Walmart and they were only 80 pesos (about 4 dollars) a piece.

Word of Warning: I have had dads come in and try to sit on these stools and totally fall off! I don't think they are really built for adults...


Another one of my beliefs that features prominently in my classroom space, is that we should be learning in a cheerfull, pleasant environment.

Our classroom should be somewhere we want to be!


I try to make the room bright and include touches to make it feel more home-y and less institutionalized. In order to make the room brighter, I hit up The Dollar Tree when I'm visiting the states in the summer, and when I'm back in Mexico, I go to Waldo's.

This year, I hit up the party section and got a whole bunch of those tissue paper balls and flowers. I also picked up some bright fabric storage boxes and some plastic buckets for table supplies.

These are cheap and useful ways to bring some color (and storage) into the room and you would not believe the difference it makes!


Another of my favorite ways to make the room feel good, is by bringing in some life! I really CAN NOT handle a class pet, so plants it is!


This year I got one pothos or spider plant for each table group. I figured those were pretty hardy plants that could survive occasional bouts of forgetting to water them... The kids love them and occasionally I find one of them gently stroking the leaves as they work.


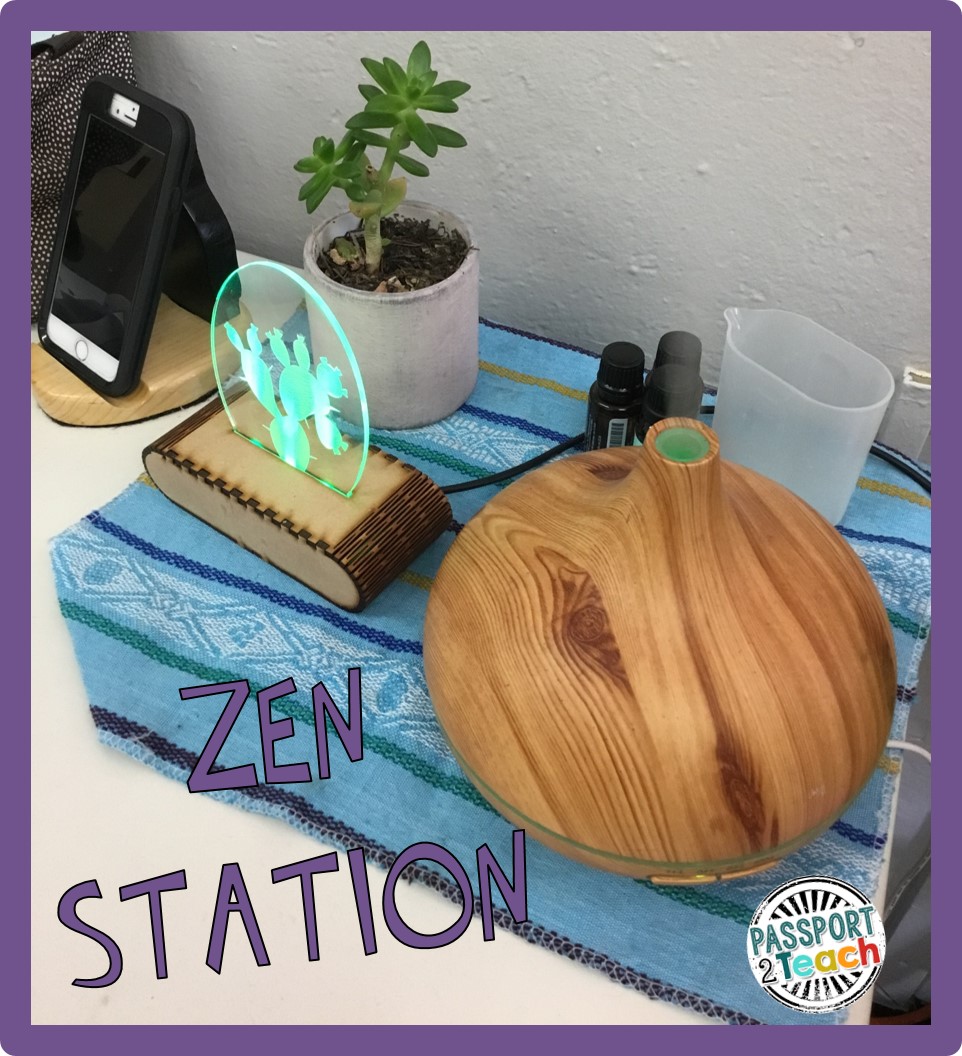
I also created a little "zen area" for myself on the corver of my desk. I included a tiny succulent, a little cactus lamp I made last year, and the oil diffuser. My classroom is always warm and I found that it can get quite stinky after recess. A few drops of peppermint in the diffuser and the room becomes pleasant-to-the-sniff once again!


Now, let me give you a quick tour of the different areas of the room! Starting with our front door...


Every year, I print out a life size picture of me using the cringily-named website Rasterbator.net. This free website is amazing! You can upload any image and decide how big you want it to be, the website then splits the image over multiple pages and you can print it out of your normal printer and then glue it together to make a poster sized image! I change up my speeck bubble message every few weeks. 


Then we move on to...


And there we are! A beautiful, welcoming, bright classroom!


Tuesday, June 11, 2019

How to get your students writing...And loving it!


I've been at an international school in Mexico for the past two years now and one thing I noticed at the beginning of this school year was that my students weren't getting as much practice free writing as they needed to. Sure, they were all getting writing instruction during our mini lesson and they were completeing the required writing assignments, but many of them weren't regularly choosing Work on Writing during Daily 5 and I could see some of their basic writing skills slipping because of lack of use.

I really wanted them engaged and excited by writing!


To do this, I looked into what I had already set up for Work on Writing and then thought about what changes I could make.

My Work on Writing table has gone through a few different iterations through the years, but it always has a bunch of interesting materials, like special monthly pencils, fact cards, prompts, writing templates, and list papers. Most of this stuff was suggested by this amazing Second Story Window blog post. Check it out here! Second Story Window Monthly Writing


I also always make space for my Write It Out! writing template pages. These are fun pages that encourage even reluctant writers to think of ideas and get started! They are especially good for students who become overwhelmed looking at a page of blank lines.

Throughout the years, all my second and third graders have loved these templates! 


Writing Templates

But, like I said earlier, all this wasn't enough!


About halfway through the year, I made some changes. I created a set of journal prompts and and put one, or two, up each week in the Work on Writing center. It become one of our weekly nonegotiables that the prompt had to be answered in paragraph form, worked on during Daily 5, and be ready to be checked by Friday.

To my surprise, my students LOVED it and we never had a single complaint! 


The 80 total prompt cards are a mix of recount, reflection, description, appreciation, and persuasive writing. They are varied enough that the students don't get bored with the questions. Click here or the picture to see this product in my TPT store!

Another change I made, was that each of these weekly prompts had to be rainbow edited. I know there are many different rainbow editing versions out there, but I created one for my classroom that fits with what I am looking for in my students' writing. Click here or the picture to get my version for free!


I find that using the Rainbow Editing helps my little friends who make careless mistakes to catch themselves, and it provides a clear way for me to diagnose those students who aren't remebering concepts taught earlier in the year. 

**cough, cough, capitalizing proper nouns, cough, cough**


Another strategy I added is the our You Try, I Check chart. This is basically just a T-chart where students write a word they are struggling to spell on thier side of the chart, and any time I have a free second during the day, I wander over to check it. If their word is spelled correctly, I just put a check mark next to it. If the word is spelled incorrectly, I circle it and rewrite it on my side of the chart. Any time the chart become full, usually after a week or so, we just put up another sheet of chart paper ontop of the old one.

It's quite interesting to see the progression of words that they want assistance spelling through the year!


As a part of the rainbow editing process, students have to circle words they may have spelled wrong. I find that this makes them more aware of their spelling and helps them to focus on using the spelling patterns that we learn. The You Try, I Check chart gives them another avenue to correct their spelling and outside of the dictionary and keeps them from breaking into my reading conferences. 

As a side note, my students took offense to the teacher centric language of the chart title and we've been trying to think of a new catchy name for it. Please feel free to let know if you guys can come up with anything better! 

So, in summation, here are all the different cogs and wheels that I keep spinning during independant writing to keep my kids interested and motivated to practice their writing skills during Daily 5. 


Enjoy!

Monday, July 16, 2018

Mini Post: Classroom Sound Signals!


First of all let me apologize for my hiatus from this blog. I made a move from Guatemala City to Mexico City and from second grade to third grade and much of my focus this year was taken up by the transition.  Getting used to a grade and a new curriculum is exhausting! But now that I’ve completed a full year, I feel like I’ve got an idea of what I’m going to do differently in this upcoming year.

As a part of this, I’ve been setting up a few things over the course of this summer and wanted to share them with you all in a series of mini-posts!


Annnnnnd my first mini-post is about my classroom….


I loooove using sound signals in my class. First, it saves my voice (I talk enough throughout the day!) and second, the kids enjoy it.

It’s a special privilege if I lean over and whisper to one of my students “Go do the rainstick.” Or “Grab the shaker egg!”

I use my sound signals for two purposes. Some of them serve as call and response signal or attention-getters. And the others tell the students to move to a certain area in the classroom. You could set up your signals to be really anything! 

There are many, many different things you could use as sound signals in your classroom, but I have 5 that I use. I post these pictures up on my wall to remind students of what action goes with which sound. At the beginning of the school year I also explicitly teach the signals to the kids and routinely practice them. 

Below are the ones I use!


I’ve chosen these signals because they are the ones that I’ve been able to acquire and I like the sounds they make, but there are so many options out there!


Just about all of these can be easily bought online. My students love my sound signals and I’m sure your students will too!

Monday, March 20, 2017

Words Their Way - How I Make it Work!


Words Their Way can be a bit of a daunting undertaking! Six years of working with it in my classroom has led me to the structure and set up that I currently use. In my second grade class, the students make dramatic jumps in their spelling pattern knowledge and WTW really accelerates their learning.

Let's jump into creating word study groups!


Spelling inventories help you to determine which spelling patterns students have a strong knowledge of, which ones they are using but confusing, and which ones they don't know at all.

The Words Their Way books provide you with different inventories (primary, elementary, and upper level inventory)


Personally, I prefer to use the spelling inventory version by Second Story Window. Check it out here! This version uses the same words, but changes up the format so that you can use the same sheet for the whole year. It makes it very easy to see individual student growth through the year.

Once you have the student inventories, it's vital to put the students into groups based on the spelling patterns they are working on. I try to keep my groups between 2 and 5 students because I want to make sure that students are getting an opportunities to talk through the sorting with a peer, and I want to make sure that all students are participating in the sorting.


Having lots of groups can be confusing (for me and the kids)! I keep a record in my Words Their Way binder, but I also keep a board up in my classroom that I can refer to easily and so the kids can remember the name and number of their sort.


Once you have your groups, then it's time to get started sorting and thinking!


Here's the rundown of a normal week of Words Their Way in my room.


Monday


Each Monday my groups receive their new sorts. They have to cut out their words, sort them as a group, and then raise their hands to show me they are ready to check over their work. I make sure that they understand the sorts and we have a short conversations about what the words mean. (This is an often overlooked component of Words Their Way that we go back to on Tuesdays.) Once checked, the students then write the words in the Sort and Search sheets.

Take a peek below at one of my groups working together to sort their words!


When finished with sorting and writing, my students have to think about a tip or a trick that will help them remember how to sort the words in the future. I've found that this section really makes the students explain the pattern in their own words. After that, they can work on the word search. This word search serves the purpose of occupying the quicker groups, giving me time to work with the other groups that require more help or time to finish.


Tuesday


On Tuesdays we take about 10 minutes out of our Daily 5 and CAFE language arts schedule to reinforce the meanings of the words with a Matching Meaning sheet. This is meant to be a quick review consisting of a definition/picture match section, a cloze sentence section, and a find the word paragraph. It helps to give the words meaningful context!


Tuesday - Thursday


During our Daily 5 time on Tuesday, Wednesday, and Thursday, my Word Work station is made up of games that help students practice sorting their words for the week. I put out the correlating games on the work work table, and students can reference the Word Sort bulletin board to remember which sort is their own. I have Connect 4 or Domino games for each sort all the way from Letter Name Alphabetic and Within Word Pattern to Syllable and Affixes.


Wednesday


On Wednesdays we complete another quick spelling activity to continue working with the words. Our Spelling Foldables address a variety of spelling and vocabulary skills. We only do one per week and so switching the 5 different activities keeps the students from becoming bored. 

The Consonants and Vowels Foldable is particularly helpful for students working with different long vowels patterns!


Spelling Foldables


Thursday


On Thursday we head into the computer lab for about 20 minutes to practice our words with the SpellingCity website/app. My kids LOVE playing these games and the extra practice is GREAT for them! What's even better is that the site already has all the lists typed up for you! (Cause you do not want to be typing in 200 some lists of words...) I often assign my students SpellingCity for homework as well. A subscription to the site costs only 60 a bucks a year and is SO worth it!


Friday 


Finally, on Fridays my students all pull their words out of their baggies and do a final sort. They then check the sort, either by conferencing with me, or by looking back at their Sort and Search sheet and then glue them into their notebook. When all members of their group have finished the final sort, I call them to me to take their spelling quiz. 


As of right now, the spelling quiz is nothin' fancy. I just call out 10 words from the sort, making sure that I hit on all the spelling patterns. I've got a few plans to jazz up my quizzes, but you'll have to wait and see!


And that's basically how I set up Words Their Way in my classroom! 

Saturday, January 7, 2017

How to Make Your Bulletin Boards Easy and Engaging!


I know many teachers that dread the task of designing and assembling new bulletin boards. Some struggle to think up what to post, others don't feel creative enough to "make it look good", and others claim that it just takes too long to put up! This post should give you some fresh ideas and a general format to follow in order to make your bulletin boards easy and engaging!

I try to create easy bulletin boards because, let's be honest, What teacher has spare hours to build elaborate, perfect bulletin boards?


But you also don't want to be just slapping up anything on your board! It needs to draw people in; it needs to be visually interesting. It needs to be engaging!


Let's start with my bulletin board story:

When I first came to my current school (four years ago!) I was greeted by the largest and blankest bulletin board I have ever seen.

I kid you not, this board is about 5 feet tall and 10 feet wide. It is a monster!


It was situated right outside my classroom and in the main lobby of the elementary building. Meaning that everybody who comes into the elementary lobby can see it, and it was my responsibility to fill it. A bit daunting.....

I began by backing it with a humongous brown piece of fabric. I've found that fabric is better than paper because it fades slower and I didn't have to staple a whole bunch of small papers together in order to cover it. The neutral brown color also means that I can leave it up regardless of what decorations I put on top. It looks good with everything!

When putting together my bulletin boards, I keep 3 things in mind:


1. Student Work


The whole point of the bulletin board is to show off the learning that is happening in your classroom, so the focal point of your bulletin board should be student work!


I find that writing samples showcase beautifully on my bulletin boards. At the end of each writing trait unit, my students complete a writing project. The final copies of these writing projects often make their way out to my bulletin board.

If you want to know about these writing projects you can check out my blog posts on them by clicking here: Writing Projects.


Student created visuals are another type of work that looks good up on the board!


Student created visuals could include:


Another form of student work that pops on a bulletin board is the use of student quotes about an activity or topic. Most recently near the end of our insect unit, I printed out giant speech bubbles (Thanks to Graphics by Sarah Beth! If you want to get her free speech bubble clip art pack, click here!) and had each student finish a prompt that I typed in the speech bubble. I then put them up on the board with a picture of the student doing an activity from our insect unit. (more on pictures later!)


2. Words

Each bulletin board I do has a phrase or sentence that tells the topic the students are learning about and draws in the reader.


To make these phrases interesting, I like to download fun and new fonts to use on my boards!

I buy fonts from TPT shops like Babbling Abby, Kimberly Geswein, Khrys Greco.  Another great place to look for fonts, especially if you just want to use them on bulletin boards and not for commercial things, is dafont.com.


I always make sure that these phrases are short and in SUPER LARGE font. When I say I use large font, trust me, I go up into the 200's or 300's in font size. This makes it easy for people to read even from across the lobby.


Short and snappy (or cheesy) phrases are best because I want the real focus of the board to be the student work, not my words.


Some phrases I've used:

  • Second Grade Super Spies! Can You Guess Our Secret Identities?
  • Dun dun, Dun dun, Dun dun dun dun dun dun. Shark Week Is Coming!
  • Wanna Come Cook with With Us?
  • Second Grade is Going Buggy for Insects
  • Get Excited About Second Grade Because Second Grade Rocks!
  • This Town Ain't Big Enough For All Of Us!

All of my big text I print, cut out, then glue on to bright colored paper, before cutting out that paper. Having that border of color around the words, helps them to pop on my board and makes it easier to read them.


3. Pictures

Most of my bulletin boards feature photos of my students. Kids LOVE seeing pictures of themselves, and the sillier the better!

During the school day, I am constantly taking candid photos of my students. Over the course of the school year, I probably take thousands. Some of them I use for our class website, others are for my TPT products, and others for this blog, and still others are for using on the bulletin board. It's like giving the whole school community a little peek into the everyday learning that takes place in my classroom.

I still love to dress up (Halloween is my favorite holiday) and of course my students do to! I often take pictures of my students in themed costumes at the end of our writing projects and it's always fun to put them up where everyone can enjoy them!


Another crowd pleaser is when I blow up the photos to life size or even more larger! In order to make my pictures this big I use a website called Rasterbator (I ignore the awkward name) This website lets you upload a photo and then choose how big you want to be. Then lets you print the photo on multiple normal sized printer paper. After that, you just line up the edges and glue the pieces of paper together. Voila! Giant pictures!


Here are a few of my recent boards in their entirety...


So get out there and start doing your bulletin board thang!

Monday, October 31, 2016

5 Tips for Successful Student Led Conferences!


I love, love, love doing student led conferences. I like that the student can really take ownership of their own learning. I love how it keeps the conversation open between myself, the student, and the parents.  I love how the student is there to verify or even say the things that I want to share.

I often find myself saying things like, "So in writing we are working on strengthening our ideas and checking for capital letters. So-and-so, what have you and I been working on in writing?"


In my grade level team, I teach language arts for all the second graders, so my conference day is PACKED! Each family can sign up for a 10 minute meeting time with me, where everyone is present. Then I send them out to the lobby where the student has a reflection packet and work samples to show. The 10 minute meetings work because reports are sent home few days before conferences giving parents time to read over the narrative and process the things I've written. When they come into conferences they already know what I have to say and they can spend more time asking questions or sharing concerns.

Here are our bookboxes with all of our reflections inside!

So...on to how to make your student led conferences great!


1. Appreciate, appreciate, appreciate!

o   I begin every conference by telling my student what I appreciate about who they are and what special qualities they bring to the classroom. They often find this a bit embarrassing, but it starts off the conference on a wonderful note. Students (and sometimes parents) can be very nervous about conferences and beginning with heartfelt appreciations makes everyone a little more calm. This appreciating should also extend to the parents. I try to make it very clear to them that I am incredibly grateful for all that they do at home to support their child’s academic progress.
·      

     2. Structure Student Reflections

o   For the majority of my second graders in the Fall, this is the first student led conference that they have ever done. Before moms and dads come in, I want those kids confident with what they are going to say and do. About a week before conferences I have the student fill out reflections on the topics that we have been learning about. These are always very specific to what we have learned in that quarter. I also have them choose a few samples of work that they can show off. I get some big ol' tables and put all the relevant reflections and work inside the student's temporarily emptied book boxes.
·       


    3. Pass out presents!

o   And no, I don’t mean toys or candy. (I'm like the anti-candy teacher; I never give out the sugary stuff!) I use CAFÉ strategies when teaching reading to my students, so this conference each child received a ring of the reading strategies that he or she was working on. I love doing this at conferences because then the student can explain the reading strategies to their parents. This keeps the parents in the loop and gives me the opportunity to share how important it is to read at home and practice using the strategies. Also, for my lower readers, I print out and assemble a ring of sight words for them to keep at home and review.

·         4. Give ‘um stuff to look at!

o   Occasionally, (I mean, ALL the time) these things get backed up and sometimes people are waiting for a few minutes. Give them something to do!

Bored people are grumpy people and nobody wants grumpy people on conference day!


       I always try to put up a new bulletin board right before conferences so that it's new for everyone. I also always leave out a table of ipads with our class website up. (This website is my baby, I LOVE posting pictures and vids of my students on it) Students especially love sharing the website videos with parents!

The unveiled bulletin board. We had just been working on our insect unit!


     5. Ask for feedback!

o   I want to know what my students AND parents are thinking about how the school year is going! I always ask them during the conference, and have received really great suggestions, some of which I’ve then implemented immediately in my classroom. Occasionally, there are things that parents don’t feel comfortable bringing up in person. To make sure that there is an avenue of communication for this, I set up some anonymous parent surveys. During the conference day, I set up a table with survey sheets and a box to put them in. Because I work in Guatemala, I print English on one side and Spanish on the other. If you would like to snag these super, simple survey sheets, head on over to my TPT store and check them out by clicking here: PARENT SURVEY SHEETS or clicking no the picture below! I also sent out a SurveyMonkey form via email. SurveyMonkey lets me know if anyone responds and can even chart responses entirely anonymously. I want to make sure that my students and parents feel that their voice is being heard!


Well, those are my 5 tips to FANTASTIC student led conferences! I hope they help you to make conferences an enjoyable and valuable experience for you, your students, and their families!!